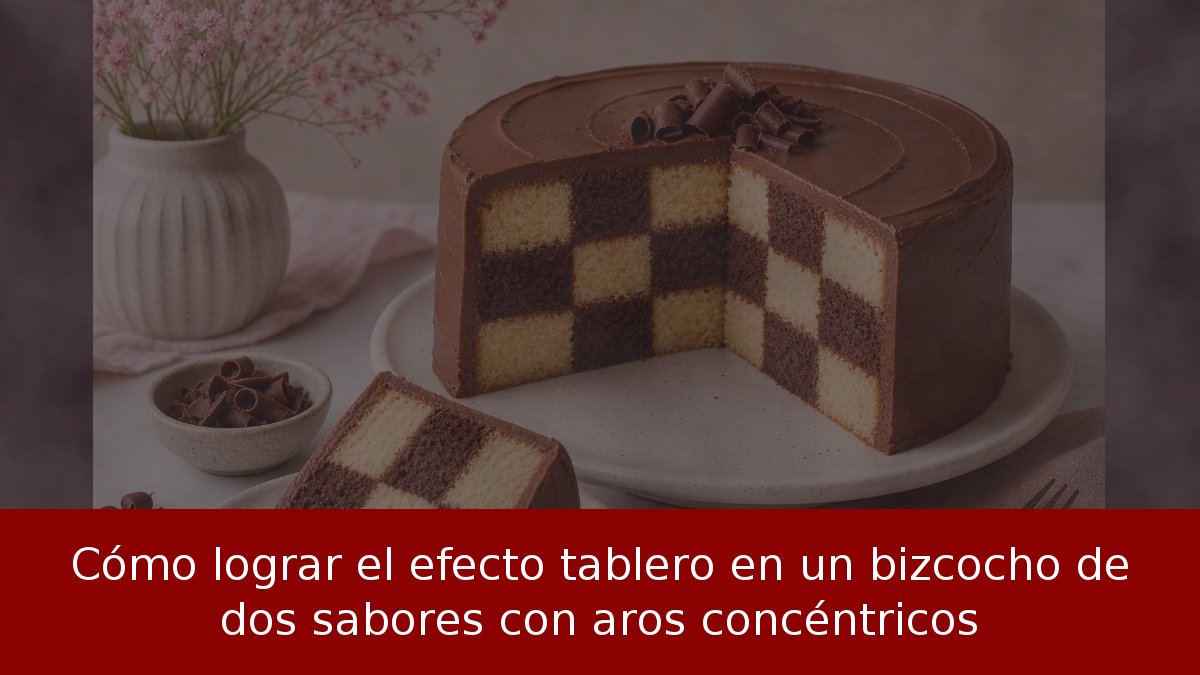
Certain desserts win people over through flavor alone, while others also impress with how they look. The chocolate-and-vanilla checkerboard cake falls into the second category: from the outside it resembles a standard sponge cake, but once sliced it reveals an alternating square pattern of light and dark tones. That appearance makes it a fitting choice for birthdays, family gatherings, or any event where you want to bring something different to the table.
- Two batters, one base: the recipe starts with a vanilla mixture and a chocolate mixture that are baked separately and then assembled into concentric rings.
- The cut is the key: two round cutters of different sizes create three sections per cake, which are swapped to produce the checkerboard effect.
- Glaze and chilling: a semisweet chocolate ganache coats the cake, and about half an hour in the refrigerator firms it up so a clean slice exposes the interior design.
Ingredients for a cake serving 10 to 12
To achieve the signature square design, you need to make two cakes of the same size. The quantities below are calculated for a medium cake of roughly 10 to 12 portions.
Vanilla sponge
- 200 grams of wheat flour.
- 150 grams of sugar.
- 3 eggs.
- 120 milliliters of milk.
- 100 grams of butter at room temperature.
- 1 teaspoon of vanilla essence.
- 1 teaspoon of baking powder.
Chocolate sponge
- 180 grams of wheat flour.
- 150 grams of sugar.
- 3 eggs.
- 120 milliliters of milk.
- 100 grams of butter at room temperature.
- 30 grams of unsweetened cocoa.
- 1 teaspoon of baking powder.
Glaze
- 200 grams of semisweet chocolate.
- 150 milliliters of whipping cream.
- 1 tablespoon of butter.
Equipment needed
- Two round pans of the same diameter.
- Two circular cutters of different sizes, or plates to use as guides.
- Mixer.
- Spatula.
- Serrated knife.
Baking the sponges
The first step is to prepare the two mixtures separately. It matters that both have a similar consistency so that, once baked, the cakes come out with comparable height and texture.
Vanilla batter
- Preheat the oven to 180 °C and grease a round pan.
- Beat the butter with the sugar until the mixture is creamy.
- Add the eggs one at a time, then stir in the vanilla essence.
- Add the flour previously combined with the baking powder, alternating it with the milk.
- Mix until all ingredients are incorporated, taking care not to overbeat.
- Pour the batter into the pan and bake for 25 to 30 minutes, or until a toothpick comes out clean.
Chocolate batter
- Repeat the previous procedure, beating butter and sugar.
- Add the eggs, then incorporate the flour, cocoa, and baking powder.
- Alternate the dry ingredients with the milk until the batter is smooth.
- Place the mixture in another pan of the same size.
- Bake for 25 to 30 minutes at 180 °C.
- Let both cakes cool completely before cutting them.
Assembling the checkerboard pattern
Once the cakes are cold, the most important part of the recipe begins: creating the squares that give the cake its character. To do this, each cake must be divided into three concentric circles of equal thickness.
- Place one cake on a flat surface and use two circular cutters to mark three sections: a central circle, a middle ring, and an outer ring.
- Repeat the process with the second cake.
- Carefully separate the chocolate and vanilla circles.
- Swap the rings to form two sets: one with vanilla in the center and outside and chocolate in the middle ring; the other with chocolate in the center and outside and vanilla in the middle.
- Place one of the layers on a base and spread a small amount of glaze between the two.
- Position the second layer so that the colors alternate relative to the one below.
Glaze and finishing touch
- Heat the whipping cream without letting it boil.
- Remove it from the heat and add the chopped semisweet chocolate.
- Stir until fully melted, then incorporate the butter.
- Let it rest for a few minutes so it thickens slightly.
- Cover the top and sides of the cake with the help of a spatula.
Refrigerate for approximately 30 minutes so the glaze firms up. Before serving, use a clean knife to cut the slices and reveal the interior design. The result is a chocolate-and-vanilla cake that looks like a chessboard, ideal for surprising guests with a dessert as showy as it is delicious.
The checkerboard cake technique shows that professional equipment isn't required to achieve a spectacular effect: two well-leveled sponges, circular cutters, and patience when fitting the pieces together are enough. The contrast between vanilla and cocoa, combined with an even glaze, makes this dessert a reliable choice for anyone seeking a visual touch without overcomplicating home baking.